Unreal Engine C++ Save System
For your game, you will eventually need to write some kind of save system. To store player information, unlocks, achievements, etc. In some cases, you will need to save the world state such as looted chests, unlocked doors, dropped player items, etc.
In this article we go through the setup of your very own C++ SaveGame system. Different types of games will have their own specific serialization needs. Use this article and code as a starting point for whatever game you’re building. You should to be fairly familiar with Unreal Engine C++ to build this system.
This won’t be a step-by-step tutorial. Instead, it’s more of a system breakdown with explanations. The full source code is available for the entire project. If you do wish for a more guided approach, I teach this concept and many others in my Unreal Engine C++ Course.
We’ll be creating a save system similar to Dark Souls with a bonfire interaction that saves the world state. We will be saving a few actors and some player information. The bonfire itself is a thematic interaction, with the real interesting bits being the actual world state that we save/load. Such as the moved item locations, previously opened treasure chests, and obtained credits (aka “Souls”).
 Bonfire (Savepoint) from Dark Souls.
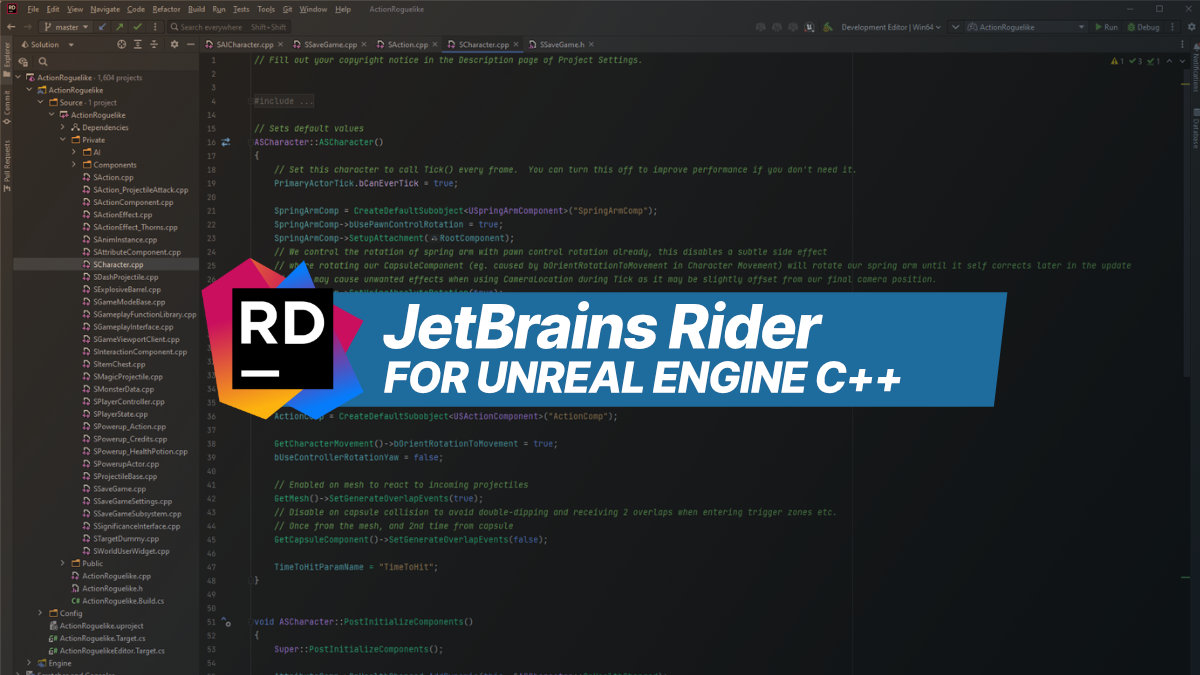
Action Roguelike (Reference Project)
The entire project is available through GitHub! I recommend you download that and browse through it. It includes additional details such as the required #includes for each class used.
This project was created for Stanford University Computer Science classes (CS193U) that I taught in late 2020. It is the reference project used in my Unreal Engine C++ online course!
SaveGame System Design
First, let’s briefly talk about the system design so you have a better understanding of intent once we get into the code.
Unreal has a built-in SaveGame UObject that we inherit from and add variables to be written to disk. Another powerful feature is the Serialize() function available in every UObject/Actor to convert our variables to a binary array and back into variables again. To decide which variables to store, Unreal uses a ‘SaveGame’ UPROPERTY specifier. The resulting binary array per Actor can be added to the SaveGame object just before writing to disk.
Loading the game will basically do the inverse operations. We load the SaveGame UObject from disk, all the variables get restored in this SaveGame object. We then pass all these variables back into the Objects/Actors they originated from such as Player position, Credits earned, and individual Actor’s state (matched by the Actor’s Name in our example) such as whether a treasure chest was looted in our previous session.
To identify which Actors we wish to save state for we use an Interface. We also use this interface to allow Actors to respond to a game load (OnActorLoaded) so he may run some actor-specific code to properly restore animation state etc. In the Action Roguelike project I re-used my GameplayInterface, but I would recommend you make a fresh interface specifically for marking objects/actors as savable (eg. SavableObjectInterface)
SaveGame files will be placed under ../MyProject/Saved/SaveGames/
Saving World State
In order to save the world state, we must decide which variables to store for each Actor and what misc. info we need to be saved to disk such as earned Credits by each player. Credits aren’t really part of the world state and belong to the PlayerState class instead. Even though PlayerState exists in the world and is in fact an Actor, we handle them separately so we can properly restore it based on which Player it belonged to previously. One reason to handle this manually is so we can store a unique ID for each player to know who the stats belong to when a player re-joins the server at a later time.
Actor Data
For Actor variables we store its Name, Transform (Location, Rotation, Scale) and an array of byte data which will contain all variables marked with ‘SaveGame’ in their UPROPERTY.
USTRUCT()
struct FActorSaveData
{
	GENERATED_BODY()

public:
	/* Identifier for which Actor this belongs to */
	UPROPERTY()
	FName ActorName;

	/* For movable Actors, keep location,rotation,scale. */
	UPROPERTY()
	FTransform Transform;

        /* Contains all 'SaveGame' marked variables of the Actor */
	UPROPERTY()
	TArray<uint8> ByteData;
};
Converting Variables to Binary
To convert variables into a binary array we need an FMemoryWriter and FObjectAndNameAsStringProxyArchive which is derived from FArchive (Unreal’s data container for all sorts of serialized data including your game content).
We filter by Interface to avoid calling Serialize on potentially thousands of static Actors in the world we don’t wish to save. Storing the Actor’s name will be used later to identify which Actor to deserialize (load) the data for. You could come up with your own solution such as an FGuid (mostly useful for runtime spawned Actors that might not have a consistent Name)
The rest of the code is pretty straightforward (and explained in the comments) thanks to the built-in systems.
To know which #include to use in C++ for our FMemoryWriter and all other classes in this blog, make sure to check out the source cpp files.
void ARogueGameModeBase::WriteSaveGame()
{
        // ... < playerstate saving code ommitted >

	// Clear all actors from any previously loaded save to avoid duplicates
	CurrentSaveGame->SavedActors.Empty();

	// Iterate the entire world of actors
	for (FActorIterator It(GetWorld()); It; ++It)
	{
		AActor* Actor = *It;
		// Only interested in our 'gameplay actors', skip actors that are being destroyed
		// Note: You might instead use a dedicated SavableObject interface for Actors you want to save instead of re-using GameplayInterface
		if (Actor->IsPendingKill() || !Actor->Implements<URogueGameplayInterface>())
		{
			continue;
		}

		FActorSaveData ActorData;
		ActorData.ActorName = Actor->GetFName();
		ActorData.Transform = Actor->GetActorTransform();

		// Pass the array to fill with data from Actor
		FMemoryWriter MemWriter(ActorData.ByteData);

		FObjectAndNameAsStringProxyArchive Ar(MemWriter, true);
		// Find only variables with UPROPERTY(SaveGame)
		Ar.ArIsSaveGame = true;
		// Converts Actor's SaveGame UPROPERTIES into binary array
		Actor->Serialize(Ar);

		CurrentSaveGame->SavedActors.Add(ActorData);
	}

	UGameplayStatics::SaveGameToSlot(CurrentSaveGame, SlotName, 0);
}
Treasure Chest Example
Now it’s time to prepare our Actors to be serialized…

Below is the TreasureChest code taken directly from the project. Note the IRogueGameplayInterface inheritance and ‘SaveGame’ marked on the bLidOpened variable. That will be the only variable saved to disk. By default, we store the FTransform of the Actor as well. So we can push the treasure chest around the map (Simulate Physics is enabled) and on the next Play, the Location and Rotation will be restored along with the lid state.
UCLASS()
class ACTIONROGUELIKE_API ARogueTreasureChest : public AActor, public IRogueGameplayInterface
{
	GENERATED_BODY()
public:
	UPROPERTY(EditAnywhere)
	float TargetPitch;

	void Interact_Implementation(APawn* InstigatorPawn);

	void OnActorLoaded_Implementation();

protected:
	UPROPERTY(ReplicatedUsing="OnRep_LidOpened", BlueprintReadOnly, SaveGame) // RepNotify
	bool bLidOpened;

	UFUNCTION()
	void OnRep_LidOpened();

	UPROPERTY(VisibleAnywhere)
	UStaticMeshComponent* BaseMesh;

	UPROPERTY(VisibleAnywhere, BlueprintReadOnly)
	UStaticMeshComponent* LidMesh;

public:
	// Sets default values for this actor's properties
	ARogueTreasureChest();
};
Finally we have the OnActorLoaded_Implementation() function to implement. This can be useful to handle load-specific logic. In the example below we simply call the existing functions that update the state of the Lid to be opened/closed.
Keep in mind however that often you can rely on BeginPlay() as your ‘OnActorLoaded’ replacement. So long as you load the saved data into each Actor BEFORE BeginPlay() has been triggered. This is why we handle the loading logic very early in the process inside our GameMode class (more on that in ‘Loading Game State’ below)
void ARogueTreasureChest::Interact_Implementation(APawn* InstigatorPawn)
{
	bLidOpened = !bLidOpened;
	OnRep_LidOpened();
}

void ARogueTreasureChest::OnActorLoaded_Implementation()
{
	OnRep_LidOpened();
}

void ARogueTreasureChest::OnRep_LidOpened()
{
	float CurrPitch = bLidOpened ? TargetPitch : 0.0f;
	LidMesh->SetRelativeRotation(FRotator(CurrPitch, 0, 0));
}
That takes care of the Actor states, all that’s left is to iterate PlayerState instances and let them store data as well. While PlayerState is derived from Actor and could in theory be saved during the iteration of all world actors, it’s useful to do it separately so we can match them to Player ID’s (eg. Steam user ID) instead of a constantly changing Actor name that we did not decide/control for this type of runtime spawned Actor.
Saving Player Data
In my example I chose to fetch all data from PlayerState just before saving the game. We do so by calling SavePlayerState(URogueSaveGame* SaveObject); This lets us pass in whatever data is relevant into the SaveGame object, such as the PlayerId and Transform of the Pawn (if the player is currently alive)
You *could* choose to utilize SaveGame properties here too and store some of that player data automatically by converting it to binary array just like we do with Actors instead of manually writing it into SaveGame, but you’d still need to manually handle the PlayerID and Pawn Transform.
void ARoguePlayerState::SavePlayerState_Implementation(URogueSaveGame* SaveObject)
{
	if (SaveObject)
	{
		// Gather all relevant data for player
		FPlayerSaveData SaveData;
		SaveData.Credits = Credits;
		SaveData.PersonalRecordTime = PersonalRecordTime;
		// Stored as FString for simplicity (original Steam ID is uint64)
		SaveData.PlayerID = GetUniqueId().ToString();

		// May not be alive while we save
		if (APawn* MyPawn = GetPawn())
		{
			SaveData.Location = MyPawn->GetActorLocation();
			SaveData.Rotation = MyPawn->GetActorRotation();
			SaveData.bResumeAtTransform = true;
		}

		SaveObject->SavedPlayers.Add(SaveData);
	}
}
Make sure you call these on all PlayerStates before saving to disk. It’s important to note that GetUniqueId is only relevant/consistent if you have an Online Subsystem loaded such as Steam or EOS.
Loading Player Data
To retrieve the Player Data we do the opposite and have to manually assign the player’s transform once the pawn has spawned and is ready to do so. You could override the player spawn logic in gamemode more seamlessly to use the saved transform instead. For the example, I stuck with a more simple approach of handling this during HandleStartingNewPlayer.
void ARoguePlayerState::LoadPlayerState_Implementation(URogueSaveGame* SaveObject)
{
	if (SaveObject)
	{
		FPlayerSaveData* FoundData = SaveObject->GetPlayerData(this);
		if (FoundData)
		{
			//Credits = SaveObject->Credits;
			// Makes sure we trigger credits changed event
			AddCredits(FoundData->Credits);

			PersonalRecordTime = FoundData->PersonalRecordTime;
		}
		else
		{
			UE_LOG(LogTemp, Warning, TEXT("Could not find SaveGame data for player id '%i'."), GetPlayerId());
		}
	}
}
Unlike loading Actor data which is handled on initial level load, for player states we want to load them in one-by-one as players join the server that might have previously played with us. We can do so during HandleStartingNewPlayer in the GameMode class.
void ARogueGameModeBase::HandleStartingNewPlayer_Implementation(APlayerController* NewPlayer)
{
	// Calling Before Super:: so we set variables before 'beginplayingstate' is called in PlayerController (which is where we instantiate UI)
	ARoguePlayerState* PS = NewPlayer->GetPlayerState<ARoguePlayerState>();
	if (ensure(PS))
	{
		PS->LoadPlayerState(CurrentSaveGame);
	}

	Super::HandleStartingNewPlayer_Implementation(NewPlayer);

	// Now we're ready to override spawn location
	// Alternatively we could override core spawn location to use store locations immediately (skipping the whole 'find player start' logic)
	if (PS)
	{
		PS->OverrideSpawnTransform(CurrentSaveGame);
	}
}
As you can see it’s even split up into two pieces. The main data is loaded and assigned as soon as possible to make sure it’s ready for our UI (which is created during “BeginPlayingState” in our specific implementation inside of PlayerController) and wait for the Pawn to be spawned before we handle the location/rotation.
This is where you could probably implement it so that during the creation of the Pawn you use the loaded data instead of looking for a PlayerStart (as if the default Unreal behavior) I chose to keep things simple.
GetPlayerData()
The function below looks for the Player id and uses fall-back while in PIE assuming we have no online subsystem loaded then. This function is used by Loading the player state above.
FPlayerSaveData* URogueSaveGame::GetPlayerData(APlayerState* PlayerState)
{
	if (PlayerState == nullptr)
	{
		return nullptr;
	}

	// Will not give unique ID while PIE so we skip that step while testing in editor.
	// UObjects don't have access to UWorld, so we grab it via PlayerState instead
	if (PlayerState->GetWorld()->IsPlayInEditor())
	{
		UE_LOG(LogTemp, Log, TEXT("During PIE we cannot use PlayerID to retrieve Saved Player data. Using first entry in array if available."));

		if (SavedPlayers.IsValidIndex(0))
		{
			return &SavedPlayers[0];
		}

		// No saved player data available
		return nullptr;
	}

	// Easiest way to deal with the different IDs is as FString (original Steam id is uint64)
	// Keep in mind that GetUniqueId() returns the online id, where GetUniqueID() is a function from UObject (very confusing...)
	FString PlayerID = PlayerState->GetUniqueId().ToString();
	// Iterate the array and match by PlayerID (eg. unique ID provided by Steam)
	return SavedPlayers.FindByPredicate([&](const FPlayerSaveData& Data) { return Data.PlayerID == PlayerID; });
}
Loading World State
Ideally, you can load your world state once while loading your persistent level. This way you can easily load in the level data and then deserialize any Actor Data from disk BEFORE BeginPlay() is called on anything. Your use-case might be more complex with streaming in/out additional levels on the fly that contain a savable world state. That’s a bit out of the scope for now, especially as my own games thankfully don’t require such functionality. I recommend checking out Steve’s library as he does handle such complex cases.
Converting Binary back to Variables
To restore our world state we do somewhat of the opposite as before. We load from disk, iterate all actors, and finally use an FMemoryReader to convert each Actor’s binary data back into “Unreal” Variables. Somewhat confusingly we still use Serialize() on the Actor, but because we pass in an FMemoryReader instead of an FMemoryWriter the function can be used to pass saved variables back into the Actors.
void ARogueGameModeBase::LoadSaveGame()
{

if (UGameplayStatics::DoesSaveGameExist(SlotName, 0))
{
	CurrentSaveGame = Cast<URogueSaveGame>(UGameplayStatics::LoadGameFromSlot(SlotName, 0));
	if (CurrentSaveGame == nullptr)
	{
	  UE_LOG(LogTemp, Warning, TEXT("Failed to load SaveGame Data."));
	  return;
	}

	UE_LOG(LogTemp, Log, TEXT("Loaded SaveGame Data."));

	// Iterate the entire world of actors
	for (FActorIterator It(GetWorld()); It; ++It)
	{
		AActor* Actor = *It;
		// Only interested in our 'gameplay actors'
		if (!Actor->Implements<URogueGameplayInterface>())
		{
		  continue;
		}

		for (FActorSaveData ActorData : CurrentSaveGame->SavedActors)
		{
		  if (ActorData.ActorName == Actor->GetFName())
		  {
			Actor->SetActorTransform(ActorData.Transform);

			FMemoryReader MemReader(ActorData.ByteData);

			FObjectAndNameAsStringProxyArchive Ar(MemReader, true);
			Ar.ArIsSaveGame = true;
			// Convert binary array back into actor's variables
			Actor->Serialize(Ar);

			IRogueGameplayInterface::Execute_OnActorLoaded(Actor);

			break;
		  }
		}
	}

	OnSaveGameLoaded.Broadcast(CurrentSaveGame);
}
else
{
  CurrentSaveGame = Cast<URogueSaveGame>(UGameplayStatics::CreateSaveGameObject(URogueSaveGame::StaticClass()));

  UE_LOG(LogTemp, Log, TEXT("Created New SaveGame Data."));
}

}
Selecting Specific SaveGame from Disk
To load a specific Save file that might have been selected in a previous level (such as your main menu) you can easily pass data between levels using GameMode URLs. These URLs are the ‘Options’ parameter and you probably used them already for things like “?listen” when hosting a multiplayer session.
void ARogueGameModeBase::InitGame(const FString& MapName, const FString& Options, FString& ErrorMessage)
{
	Super::InitGame(MapName, Options, ErrorMessage);

	FString SelectedSaveSlot = UGameplayStatics::ParseOption(Options, "SaveGame");
	if (SelectedSaveSlot.Len() > 0)
	{
		SlotName = SelectedSaveSlot;
	}
	LoadSaveGame();
}
Now while loading a level you should pass in ?savegame=MySaveFile in the options. “savegame” as an option is made up, you can type whatever as your option, just be sure to parse that same ‘option’ in C++.

Loading SaveGame before BeginPlay
In the code example prior I showed loading the data during InitGame() which happens pretty early during the loading phase. That means that we have our level data available and yet not called BeginPlay() yet on anything. That lets us deserialize variables and use BeginPlay() as a way to react as if those saved variables are their blueprint originals.
This could be useful to initialize with the relevant saved data or skipping entire blocks of code in BeginPlay by saving a specific bool such as bHasSpawnedLoot (make sure you mark this with SaveGame) to not accidentally re-run this logic if it has already done so in the previous session and should do so only once.
The Bonfire

In the previous sections we set up the entire save/load system. Now to finish it off, I’ll break down how to make a simple bonfire-style interaction. I’m skipping all the steps specific to interacting with the Actor itself, you can view the source code for more details.
Now to create the actual Bonfire in Blueprint it’s super simple and fast to do because we did most of the hard work already. Here are the basic steps required including the Blueprint Node below.
-
New Actor Blueprint with a mesh and particle system (the fire)
-
Disable ‘Auto Activate’ on the particle system, we’ll only turn it on after interacting with it once (and storing this as bool in the Actor for later loads)
-
Add the Interface (GameplayInterface in our case) to mark it for the save system.
-
Add a bool bFireActive and mark it as SaveGame (find it in the variable details, you will need to open up the Advanced options - see below for image)
-
Setup the graph like below - we interact with the fire (Event Interact) which updates bFireActive and then saves the game. We then update the particle state.
Once interacted with once, the bFireActive is now saved into the bonfire and on the next game load the particle system will activate through OnActorLoaded (our own interface function) You can do the same through BeginPlay() as we’ll have loaded our Actor data before that is called as mentioned earlier in this post.
 Bonfire Blueprint Graph
 ‘SaveGame’ is checked.
As you can see there isn’t a lot of complexity involved in this basic SaveGame system. And even setting up savable variables in Blueprint is quite easy once the boilerplate has been implemented. There is a lot more to consider and required for your own complete system that covers all cases and will depend on your game mechanics. Perhaps you’ll need to save the state of the ActorComponents too, or UObjects that hold info about abilities and/or attributes. I’ll briefly discuss these in the next paragraph, but all are outside of the scope of this tutorial.
Limitations & Improvements
Of course, this system is just a starting point for your own fully-featured save system. There are some things to consider when building your own system that I encountered so far including respawning Actors that were spawned during the previous session instead of loaded from a Map/level file.
You also should track which Actors got destroyed in the previous session. For this, you can make assumptions based on the SaveGame data. When there is no SavedActorData in your SaveGame but your Actor (loaded from level) does have a savable interface, you should be able to immediately call Destroy on it.
You might want to consider placing all this logic in a Game Subsystem which more neatly splits your save/loading logic out from the GameMode class.
For the demo project, we only assume a single persistent level and don’t save any LevelName with the Actor or have a specific Array of Actors per (Streaming)Level. That would likely be something you need depending on your game’s design.
It’s a great idea to include a version number in your save file as a sort of header. This way you can find out incompatible (old) SaveGames and even handle conversions from old to new save versions when possible (eg. when a data format has changed but can be converted with some code) Epic’s ActionRPG Example (May be deprecated as of UE5) has an implementation of this.
Closing
That’s all for the basics of your SaveGame system! This can be molded in all directions to fit your needs, and there is certainly a lot that can be added. I recommend checking out the additional resources below for more information on the subject.
Also, don’t forget to sign-up for my newsletter below for any new content I post! And follow me on Twitter!