Custom Depth in Unreal Engine
Unreal Engine 4 introduced a new depth buffer along with its PBR rendering system. It’s called “Custom Depth” and can be used for effects like the selection outline that is built-in in the Editor, rendering of occluded meshes, or custom culling of transparency. I will discuss some of the basics of using this buffer in the material editor and explain some of the features I used it for in my own projects.
When using Custom Depth it’s important to read through the Issues & Limitations at the bottom of the page to prevent unnecessary debugging.
Custom Depth 101
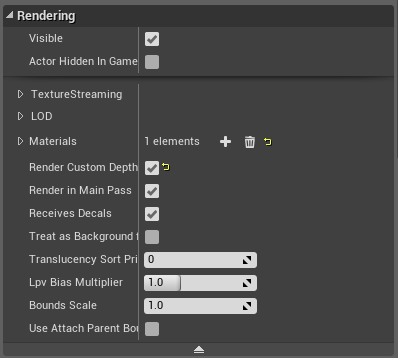
For those who have never used this feature before, you can enable Custom Depth for both Static and Skeletal meshes under the Rendering category named “Render Custom Depth” in the Details Panel.
To view the render output for this particular buffer go to Buffer Visualization in the viewport options of the Editor Viewport. Note that objects close to the camera are near-black and may be difficult to see!
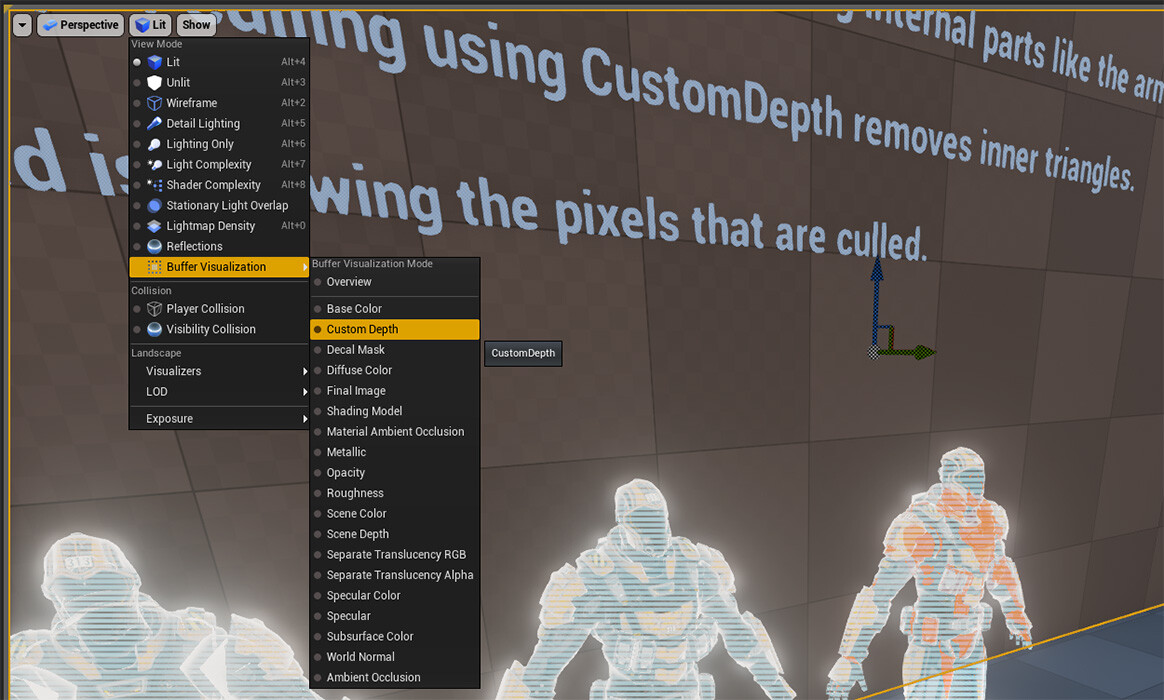
 Custom Depth Visualizer in the Unreal Editor
Rendering Object Outlines
To render outlines around specific meshes (like a fallen ally, usable loot container, etc.) we need a buffer to get their silhouettes. Custom Depth is perfect for this.
With the buffer filled with our object depth info, we can perform a simple depth comparison by sampling the neighboring pixels in our post-process. If a neighbor has depth info but the pixel itself does not - we color it to our outline color.
We can use another technique for drawing a translucent overlay for all occluded geometry by comparing custom depth against SceneDepth. If CustomDepth is larger than SceneDepth we blend in a white tint with SceneColor.
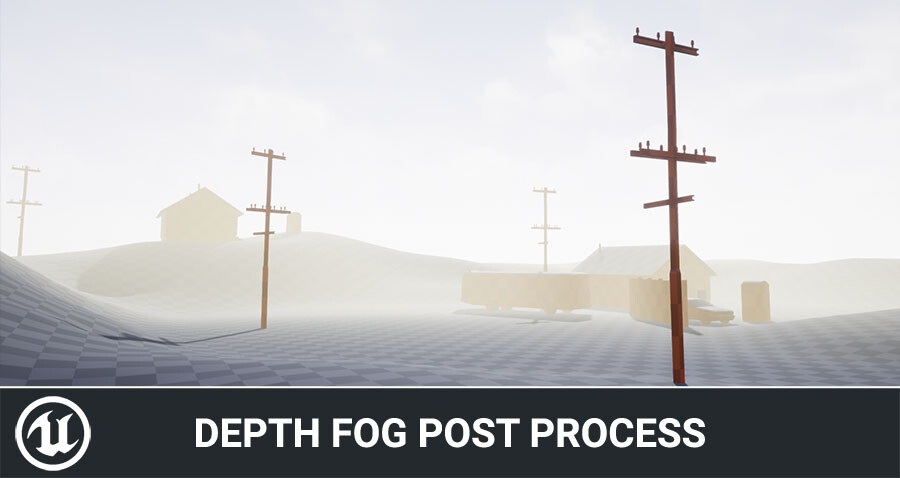
Combining both techniques results in the post effect below:
I skipped over most of the implementation details - if you have any questions feel free to ask them in the comment section below! I’ve made this effect available for download, feel free to modify and use this in your game. (Check the next paragraph for a much more detailed and advanced version of this effect!)
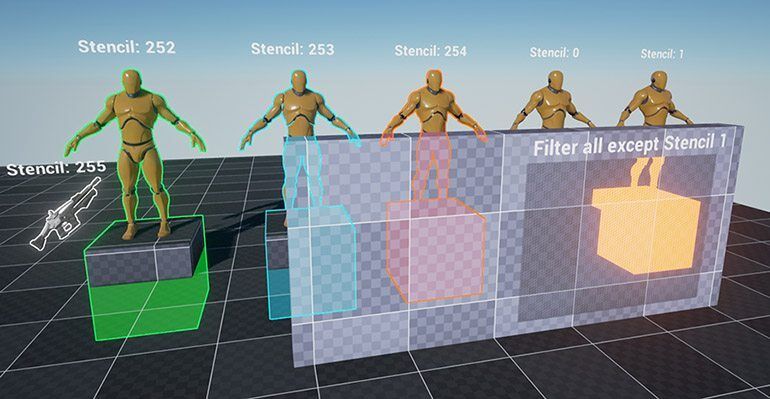
Multi-Color Outline Effect
A few engine versions ago Stencil Index buffer was added alongside Custom Depth. This enables us to create multi-colored outlines among many other cool new tricks! Click here to read about this new effect and how to use it.
Visualizing Custom Depth at Runtime
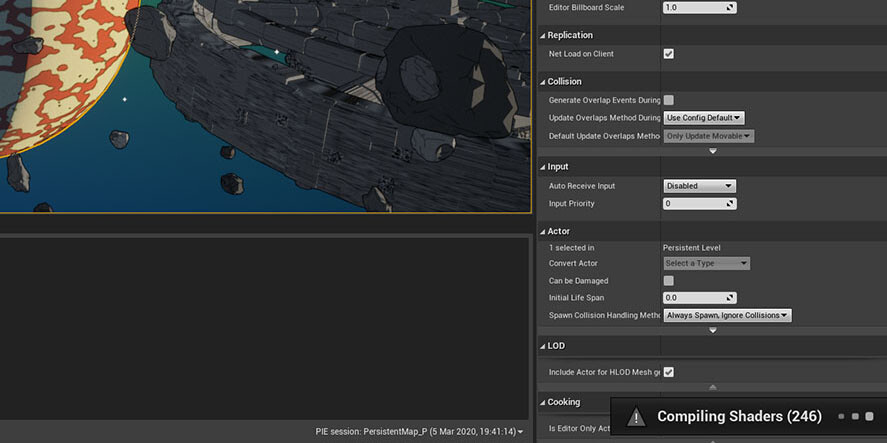
While you can visualize the Custom Depth buffer in the editor, you are more likely interested in visualizing this buffer during PIE or even in a packaged game build.
Use the following console command to add a picture-in-picture style visualizer:
vis customdepth // picture-in-picture
vis customdepth uv1 // fullscreen
Culling Inner Triangles
When using transparency on models like characters that have inner triangles (eyes, mouth, arm, or bit of armor sticking through) you will see a noticeable highlight in your material that attracts attention and simply doesn’t look right. We can solve this issue using Custom Depth.
By rendering our character into the Custom Depth buffer we can cull any pixels that are behind the outer shell of the mesh. A slight depth offset should be added when comparing the depth of Scene and Custom to prevent too many pixels to be culled including the outer shell. The material setup for this is quite simple:
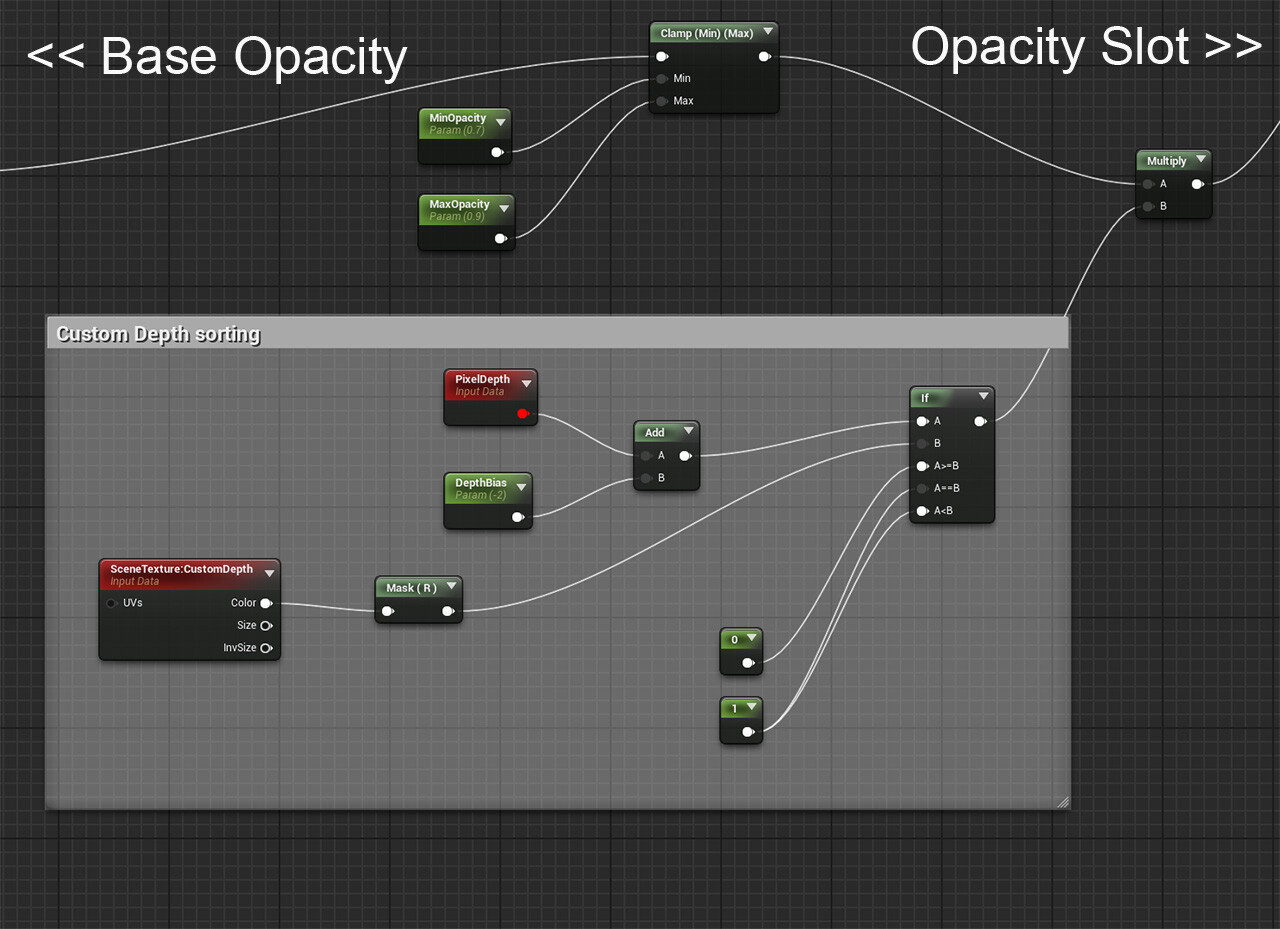
Material Nodes - Copy this URL content and you can directly paste the above nodes into your own material. (Project Source is available on GitHub)
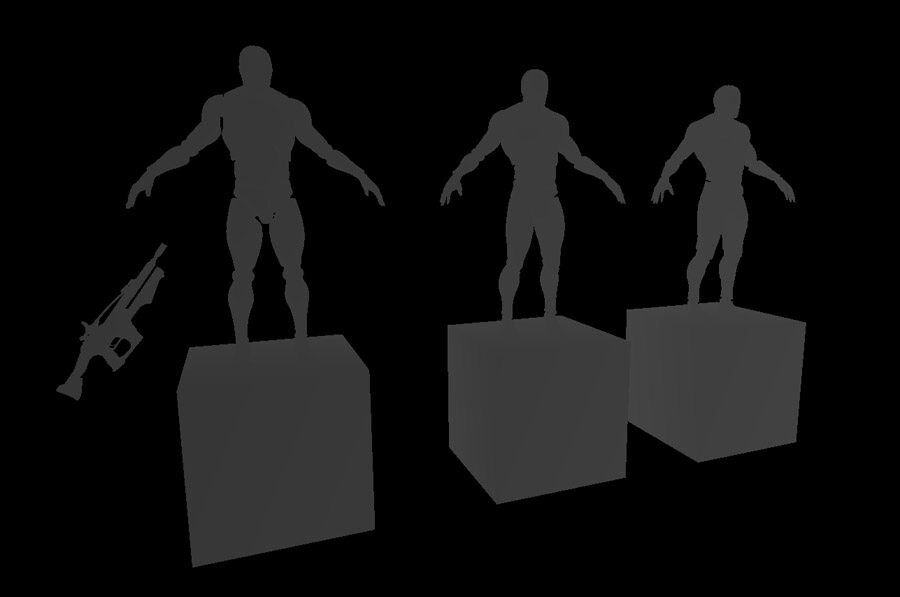
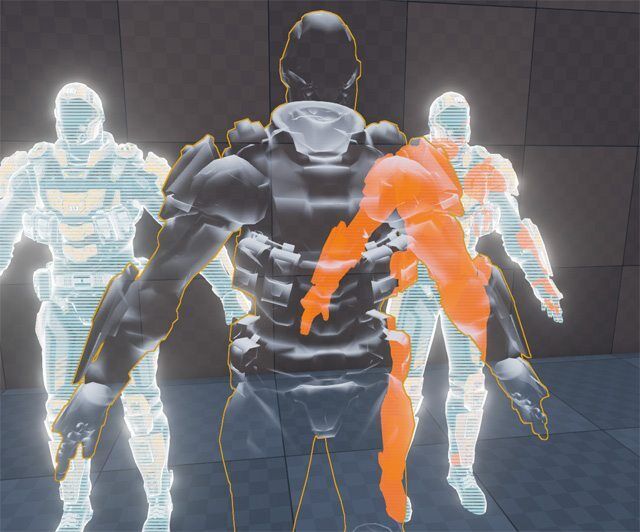
I made a comparison of depth culling enabled and disabled in the setup below. The character on the right displays all occluded pixels in red. I rendered each character TWICE to work around a limitation where transparent materials do not render into custom depth at all (this is normal behavior for SceneDepth, but undesirable when explicitly enabling Custom Depth on a mesh with transparency applied) You can download the project source to see exactly how this was done.
Note: As of 4.20+ you can render translucent materials for Custom Depth by enabling the option in the material: “Allow Custom Depth Writes”. This removes the need for a second mesh component which is a huge workflow improvement.
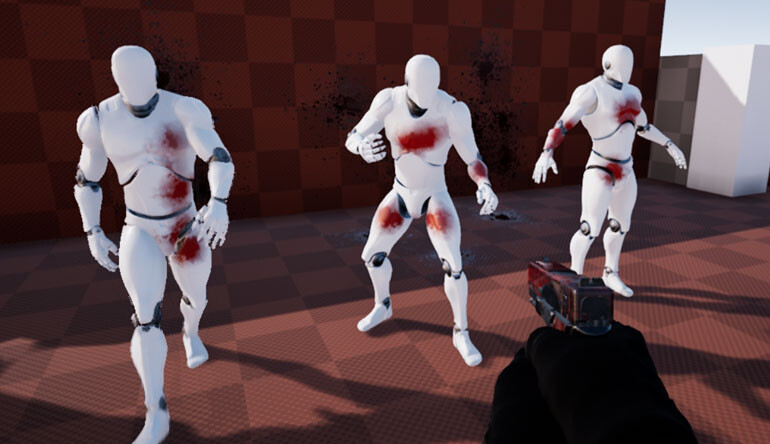
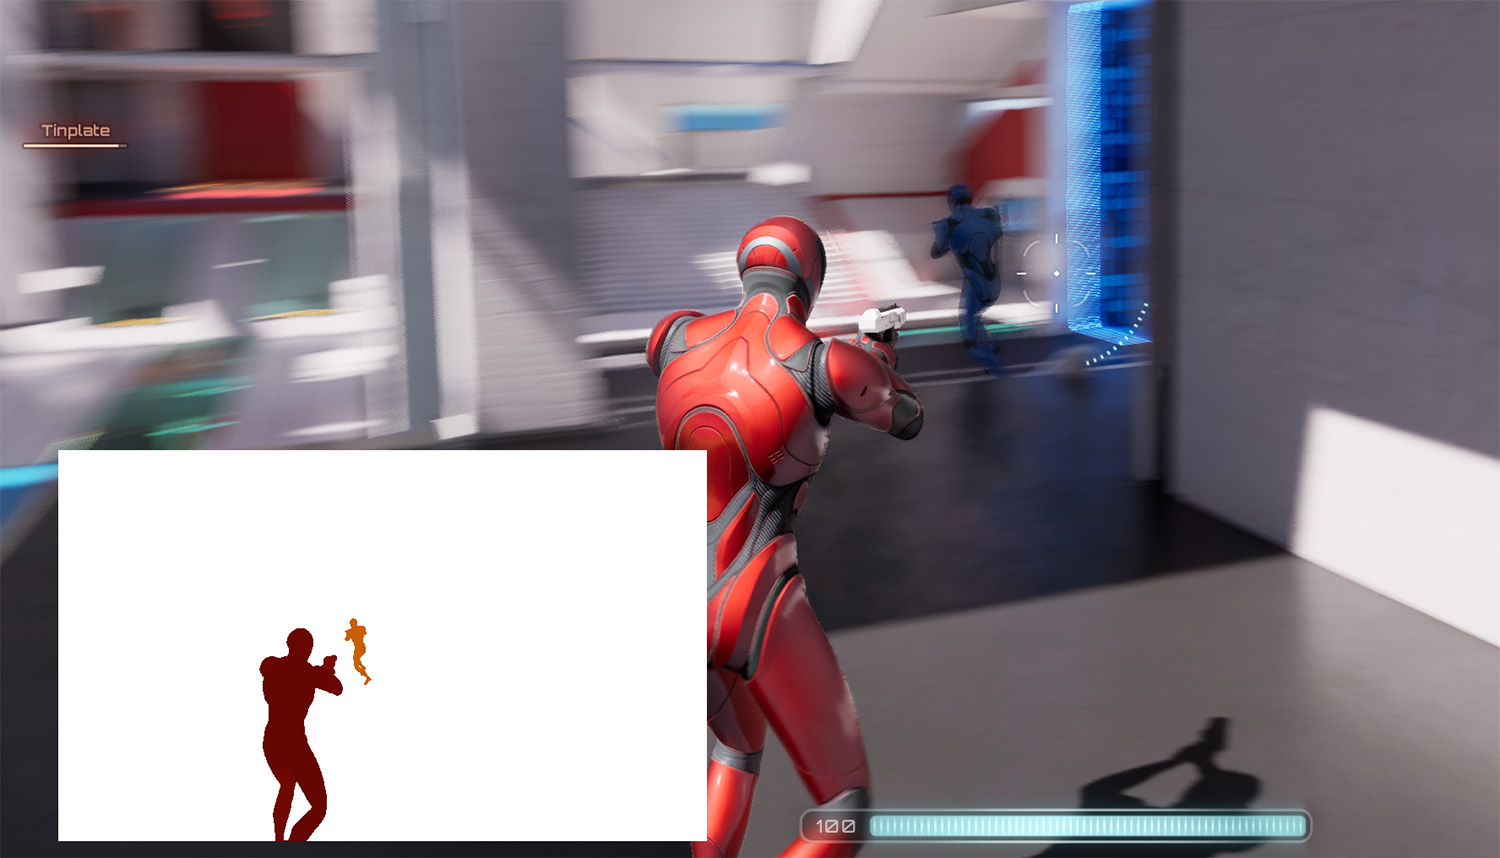
For our game Switch, we used this culling technique on a stealth effect giving it a more consistent ‘shell’ and highlight on a mesh that has a lot of overlapping pixels.
It’s important to know that if multiple materials use this technique that only the object closest to the camera is culled correctly. In this image, you can see the errors can would occur if you have multiple meshes overlapping. This should be taken into consideration when considering this technique - it may never be an issue if you use this effect sparingly or in isolated scenarios.
This issue can possibly be solved by adding a max depth delta when culling. I have had no need to dive into this further but may come back to this in the future when it starts to cause practical issues.
Other Uses
As previously mentioned, for our game Switch we used Custom Depth for a number of features, one of them included an x-ray material that exposes players behind a wall - I added a short video of an early proof of concept below.
Issues & Limitations
- For translucent materials, you need to enable “Allow Custom Depth Writes” in your material.
- Because the buffer is filled with all objects using Custom Depth it will not work when having multiple overlapped meshes (one behind the other) depending on how you’re using the depth value. A transparent mesh might be entirely culled if you use custom depth to cull inner triangles. A possible workaround is to add a maximum depth difference when looking for inner triangles to reduce the errors.